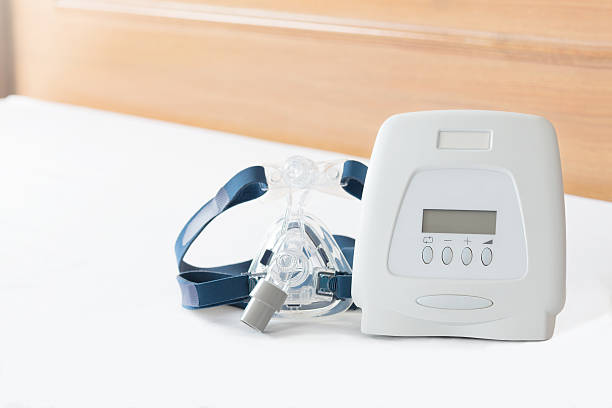
The ResMed AirSense 10 is a state-of-the-art device that provides effective and comfortable treatment for patients with sleep apnea. To ensure that you get the most out of your device, it is important to understand its key features and functions, as well as how to properly operate and adjust it. In this expert guide, we will walk you through every step of the process, from unboxing and setup to troubleshooting common issues and regular maintenance.
Understanding Your ResMed AirSense 10
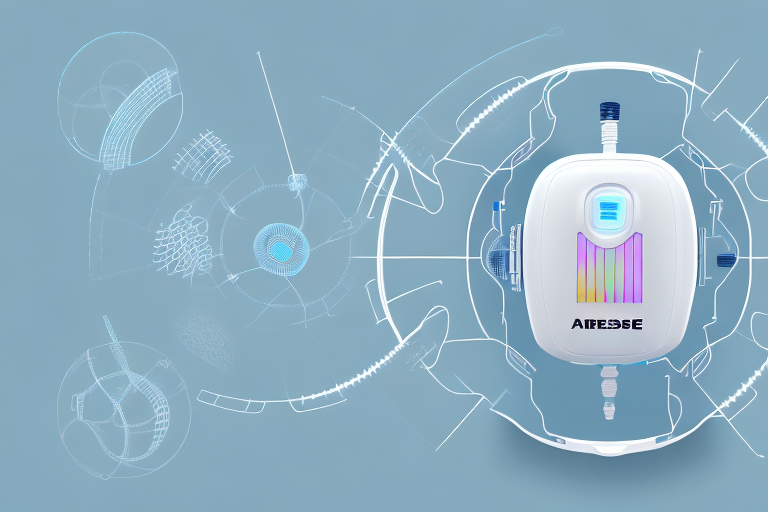
Before delving into the intricacies of operating and adjusting your ResMed AirSense 10, let’s first familiarize ourselves with its key features. This device combines advanced technology with user-friendly design, making it easy to use and manage. Some of its notable features include:
Key Features of the ResMed AirSense 10
The ResMed AirSense 10 is equipped with an intuitive interface that allows you to navigate through its various settings effortlessly. It offers a wide range of customization options, such as adjustable pressure settings and ramp-up features to ensure optimal comfort throughout the night. Additionally, the device is equipped with a built-in humidifier, which helps to prevent dryness and irritation of the airways.
One of the standout features of the ResMed AirSense 10 is its advanced data tracking capabilities. The device can record and store detailed information about your sleep patterns, including your apnea events, mask leakages, and usage hours. This data can be accessed through the device’s built-in display or transferred to your healthcare provider via wireless connectivity, allowing for accurate monitoring and adjustment of your therapy.
Furthermore, the ResMed AirSense 10 incorporates smart technology that can detect and respond to changes in your breathing patterns in real-time. This ensures that the device can provide the necessary pressure adjustments to maintain a consistent and effective therapy, even as your sleep apnea condition may fluctuate throughout the night. Learn more how resmed airsense 10 enhances sleep apnea management.
The Importance of Proper Operation and Adjustment
Proper operation and adjustment of your ResMed AirSense 10 are crucial for achieving effective treatment and ensuring your comfort. By understanding how to operate and adjust the device correctly, you will be able to personalize your therapy and optimize your sleep apnea treatment.
When it comes to operating the ResMed AirSense 10, it is important to familiarize yourself with the device’s user interface. The intuitive menu system allows you to navigate through the various options and settings easily. From adjusting the pressure levels to setting up the ramp feature, the user-friendly design ensures that you can customize your therapy to suit your individual needs.
In addition to operating the device, proper adjustment is key to maximizing the benefits of the ResMed AirSense 10. This involves finding the optimal pressure settings that provide effective treatment while ensuring your comfort. Consulting with your healthcare provider can help you determine the ideal pressure range based on your sleep apnea severity and individual preferences.
Furthermore, the built-in humidifier plays a crucial role in enhancing your comfort during therapy. Adjusting the humidification settings according to your personal preference and the climate conditions in your environment can help prevent dryness and irritation of the airways, ensuring a more pleasant experience throughout the night.
By taking the time to understand and master the operation and adjustment of your ResMed AirSense 10, you can optimize your sleep apnea treatment and enjoy a restful night’s sleep. Remember to consult with your healthcare provider for personalized guidance and support in using this advanced device.
Getting Started with Your ResMed AirSense 10
When you first receive your ResMed AirSense 10, it is important to go through the unboxing and initial setup process. This will ensure that your device is ready to use and properly calibrated for your individual needs.
Unboxing and Initial Setup
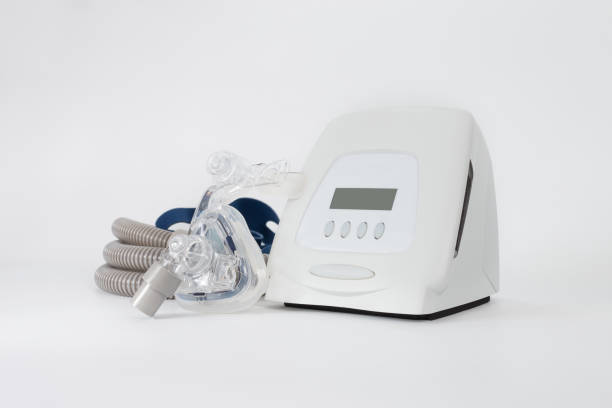
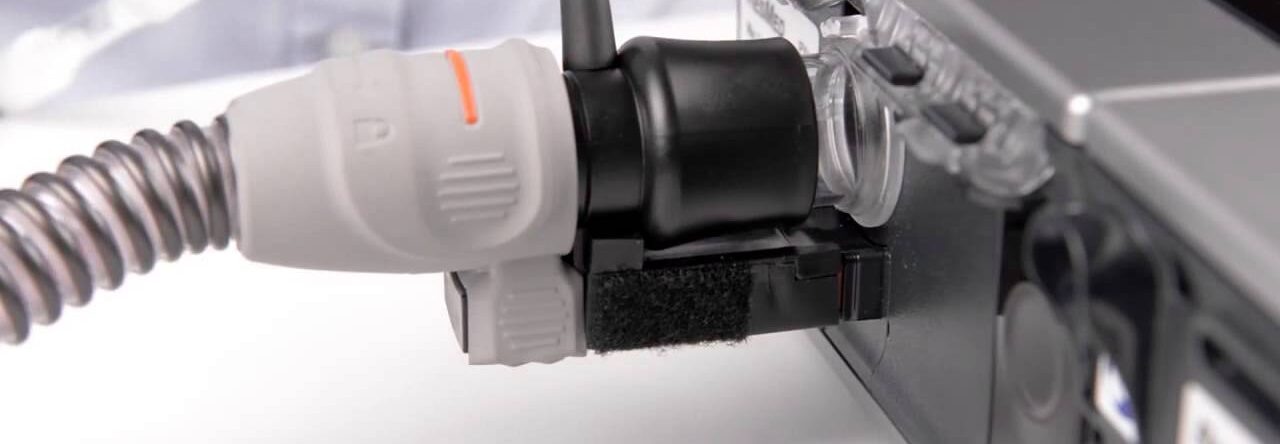
Start by carefully unpacking your ResMed AirSense 10 and its accessories. Ensure that all components are present and in good condition. Once you have everything ready, proceed with the initial setup. This may involve connecting the power cord, inserting the SD card, and setting the date and time on the device.
As you unbox your ResMed AirSense 10, you’ll notice the sleek and modern design of the device. Its compact size makes it easy to fit on your bedside table, ensuring convenient access during your sleep therapy.
Once you have connected the power cord, you’ll see the device come to life with a vibrant display. The user-friendly interface guides you through the setup process, making it simple and intuitive, even for first-time users.
Familiarizing Yourself with the Controls
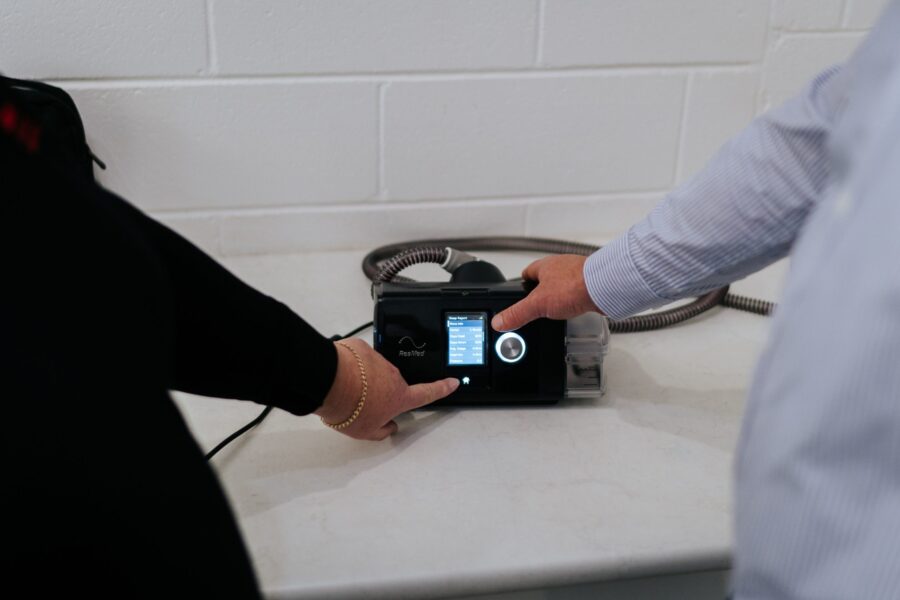
Take the time to familiarize yourself with the various controls and buttons on your ResMed AirSense 10. This includes understanding the purpose of each button, such as the power button, menu button, and ramp button. Knowing how to navigate the menu and adjust settings will allow you to customize your therapy to suit your individual preferences.
The power button, located prominently on the top of the device, allows you to turn the ResMed AirSense 10 on and off with a simple press. This convenient feature ensures that you can easily start and stop your therapy whenever needed.
The menu button, located next to the power button, grants you access to a range of settings and options. By pressing this button, you can navigate through the device’s menu and make adjustments to parameters such as humidity level, mask type, and therapy pressure.
The ramp button, situated on the front of the device, enables you to gradually increase the therapy pressure over a specified period of time. This feature is particularly useful for users who find it more comfortable to start with a lower pressure and gradually acclimate to the prescribed level.
As you become familiar with the controls, you’ll appreciate the thoughtfully designed layout of the ResMed AirSense 10. The buttons are strategically placed for easy access and intuitive operation, allowing you to make adjustments effortlessly, even in the dark.
In addition to the buttons, the device also features a clear and informative display. The bright screen provides real-time feedback on your therapy, displaying essential information such as therapy hours, mask fit, and leak rate. This allows you to track your progress and ensure that your therapy is effective and consistent.
By taking the time to understand the controls and features of your ResMed AirSense 10, you can optimize your sleep therapy experience. With its user-friendly design and advanced functionality, this device empowers you to take control of your sleep apnea treatment and enjoy restful nights of sleep.
Detailed Operation of Your ResMed AirSense 10
Once you have completed the initial setup, let’s dive deeper into the detailed operation of your ResMed AirSense 10. This section will cover essential aspects such as powering on and off, adjusting the settings, utilizing the built-in humidifier, and additional features that enhance your sleep therapy experience.
Powering On and Off
To power on your ResMed AirSense 10, simply press and hold the power button until the device turns on. The device will go through a startup sequence, initializing the necessary components for optimal performance. Likewise, to power off the device, press and hold the power button until it gracefully shuts down, ensuring that all data is saved and settings are preserved. It is important to note that the device should be powered off before disconnecting it from the power source to prevent any potential damage.
Adjusting the Settings
Your ResMed AirSense 10 provides you with a wide range of settings to customize your sleep therapy experience. One of the key settings is the ramp time, which allows you to gradually increase the therapy pressure when you start your therapy session, providing a gentle and comfortable transition into sleep. Additionally, you can adjust the therapy pressure to suit your individual needs, ensuring that you receive the optimal level of air pressure to keep your airways open throughout the night. The device also offers features such as the auto-start function, which automatically starts the therapy when you put on your mask. These settings can be easily accessed and adjusted through the user-friendly interface of the device. For detailed instructions on how to make these adjustments, refer to the device’s user manual.
Using the Built-In Humidifier
The built-in humidifier of your ResMed AirSense 10 plays a crucial role in enhancing your sleep therapy experience. It helps prevent dryness and discomfort that can sometimes occur during therapy. To ensure optimal performance, it is important to fill the humidifier chamber with distilled water before each use. The level of humidity can be adjusted according to your preference, allowing you to find the perfect balance between comfort and effectiveness. Regularly cleaning the humidifier is essential to maintain its performance and prevent the buildup of mineral deposits. Refer to the user manual for detailed instructions on how to clean and maintain the humidifier.
Additional Features
In addition to the core functionalities mentioned above, your ResMed AirSense 10 comes equipped with several other features that further enhance your sleep therapy experience. One such feature is the integrated cellular connectivity, which allows you to remotely monitor your therapy data and receive important notifications through the ResMed myAir app. This enables you to stay informed about your therapy progress and make any necessary adjustments to ensure optimal results. The device also features an intuitive color LCD screen that provides clear and easy-to-read information about your therapy settings, usage hours, and mask fit. Furthermore, the AirSense 10 is designed with advanced algorithms that continuously monitor your breathing patterns, ensuring that the therapy pressure is adjusted in real-time to provide the most effective treatment.
With its comprehensive set of features and user-friendly design, the ResMed AirSense 10 is a reliable and efficient sleep therapy device that is designed to help you achieve a restful and rejuvenating sleep. By understanding the detailed operation of your device and utilizing its various settings and features, you can personalize your therapy experience and enjoy the benefits of improved sleep quality and overall well-being.
Troubleshooting Common Issues
While the ResMed AirSense 10 is a reliable device, you may encounter certain issues from time to time. Here are some common problems and the steps you can take to resolve them.
Dealing with Air Leaks
If you notice air leaks from your mask during therapy, it is important to address this issue promptly. Check the mask for any signs of damage or improper fit. Adjust the straps to ensure a snug but comfortable fit. In some cases, you may need to replace the mask or its components to resolve the issue.
Resolving Error Messages
At times, your ResMed AirSense 10 may display error messages on its screen. These messages are designed to alert you of any issues that require attention. Refer to the user manual for a list of common error codes and their corresponding solutions. In case of persistent errors, it is advisable to contact the manufacturer’s customer support for further assistance.
Regular Maintenance and Cleaning
Proper maintenance and cleaning of your ResMed AirSense 10 are essential for its longevity and optimal performance.
Cleaning the Air Filter
The air filter of your ResMed AirSense 10 should be cleaned regularly to maintain effective airflow and prevent dust buildup. Follow the manufacturer’s instructions on how to remove, clean, and replace the air filter. It is generally recommended to clean the filter weekly or as needed.
Replacing Parts
Over time, certain parts of your ResMed AirSense 10 may wear out and require replacement. This includes the mask, tubing, and humidifier chamber. Refer to the user manual for guidelines on when to replace each component. Regularly inspect the parts for signs of wear and tear, and replace them accordingly to ensure optimal therapy.
By following this expert guide, you will be equipped with the knowledge and understanding to operate and adjust your ResMed AirSense 10 effectively. Remember, proper usage and maintenance will not only enhance your sleep apnea treatment but also prolong the lifespan of your device. Sweet dreams!